
Growing up in Wyoming I was constantly surrounded by natural beauty, generally on an heroic scale. The plains stretch from horizon to horizon, the Rocky Mountains shoulder the sky, and thunderstorms, blizzards, and floods put any Hollywood disaster flick to shame. It's easy to feel insignificant in such surroundings. As a consequence of this, I spent much of my childhood imagining tiny worlds, probably in an effort to re-assert my own sense of scale. At the Vedauwoo Recreation Area, surrounded by towering piles of granite, a pool of snowmelt in the hollow of a boulder became a lake haunted by miniature monstrosities and dared by tiny heroes. In my hometown of Laramie, the late spring slush, carved by passing car tires and sparkling in the light of dawn, became fantastic ice canyons through which frigid rivers rushed. Can you tell I was destined to write fantasy novels?
My fascination with tiny worlds has never left me. Today, when I'm not writing stories set in worlds of my own creation, I am building miniature gardens. To me, miniature gardening is another form of storytelling, and like any good story, they should have a theme.
The theme I have been experimenting with for the last two or three years is what I call 'The Lost Daibutsu.'
Daibutsu is a Japanese word meaning 'Big Buddha.' It is used in a general sense to describe any large statue of Buddha, whether cast in bronze or carved into the side of a cliff. The phenomenon is not unique to Japan; there are giant Buddha statues all over the East. Most are well-maintained and well-loved, but some are neglected, whether through the poverty of the region or the tides of political and religious feeling. And some have been destroyed, most recently the Buddhas of Bamiyan, dynamited by the Taliban in 2001.
It is the forgotten Daibutsus, those that have been relinquished to the hunger of the elements, that interest me most. Today we're going to create one!
Step One: Choose Your Tools
The Lost Daibutsu is a very simple theme to follow, so you don't need much. I like to work on a table, with a boot tray to keep the mess contained. Tubtrugs are great for holding potting soil, and they come in fun colors. I used to have a fancy soil scoop, but I lost it somewhere - probably underneath a plant. Now I just use my hands, which actually works better. A Hori Hori (the little knife with the wooden handle, shown in the picture) is probably the most useful gardening tool ever. You can use it like a trowel, a soil scoop, a potting knife - you name it. A pair of fine-tip gardening scissors are helpful for cleaning up tiny plants. And finally, always use a Keeper Stopper - those are the little round screens in the bottom left of the picture - to cover the drainage hole. This helps keep the soil in and unwelcome visitors like slugs out.
Step Two: Choose Your Pots
Any kind of broad, shallow pottery works great for miniature gardens. I prefer rustic pottery for this kind of work, since I'm trying to depict a fairly wild scene, but glazed or terra cotta pots work just as well. The Hunt Collection and AW Pottery make excellent rustic pots ranging from simple and understated to fun and funky.
Step Three: Choose Your Statues
I've accumulated a lot of Buddha statues over the years, so I have plenty to choose from. There are a million styles out there, including more whimsical types like the frog and cat Buddhas by My Spirit Garden.
Broken Buddha statues work just fine, even ones without a head, which is great news for people like me who own cats, because cats are self-centered jerks who like to trip you when you're carrying Buddha statues and then give you dirty looks like it's your fault. Remember, those giant cliff-side Buddhas are often damaged by the cycles of frost and thaw, penetrating plant roots, geological activity, fire, lightning, and vandalism. Your broken statues can be just as authentic as the whole ones, and help to reinforce the theme of neglect.
I also make sure to have a couple different sized bricks available (you'll find out why in Step Five), and some nice decorative stones (see Step Six).
Step Four: Choose Your Plants!
This is the fun part!
Your imagination is the limit. A cat-headed Buddha, strange synthesis of Bast-worship and Buddhism in Ancient Egypt? You'll probably want cactus for this one, and lots of sand. A frog-headed Buddha on the surface of the planet Venus, circa A.D. 2214? Probably carnivorous pitcher plants, tillandsias, and bromeliads will most accurately depict the lush jungles of Venus.
The important thing to remember here is that miniature gardening, like all container gardening, is an ephemeral art. No matter how tiny and cute it is today, by the end of the growing season there's a good chance it will have outgrown your garden and possibly even attempted to eat it's neighbors. Just remember, you can always pull a troublemaker out and plant it in another container or in your garden, give it to a friend (or, depending on how ill-behaved the plant turned out to be, an enemy), or just compost it. Don't be afraid to experiment and learn.
When I'm shopping for tiny plants to put in a miniature garden, I am generally looking for a good mix of textures and colors. Texture is important, especially at this scale. It can be easy to go overboard with super-tiny-leaved plants like Elfin thyme and heathers, but try to mix in some larger leaves, as well. Boxwood and mini Hostas are good examples. And don't neglect the long, strappy leaves. Little grasses like Uncinia and dwarf Mondo grass provide a nice balance with smaller, rounded foliage.
And color is important, too. There are sedums in just about every color you can imagine, gold or white-frosted conifers, blooming heathers, and flowering rockery plants that can all contribute to the wild beauty of the scene.
I don't worry too much about the mature sizes of the plants I'm selecting or their specific care requirements, for two reasons:
One, because I know it's temporary.
Two, because rules are things that happen to other people. ;)
Step Five: Build Your Base
I begin every container with a screen over the drainage hole. Then I use bricks as a platform to raise the Buddha, so it's sitting on a base more solid than just potting soil. This pot in particular is challenging to work with because the front is lower than the back. I use a piece of decorative stone as a kind of 'retaining wall' so I can plant higher up near the back of the container. I like the effect of this; it emphasizes the idea of a Daibutsu built near a mountain peak, accessible only by a steep mountain trail.
Step Six: Set the Scene

Now it's time to plant!
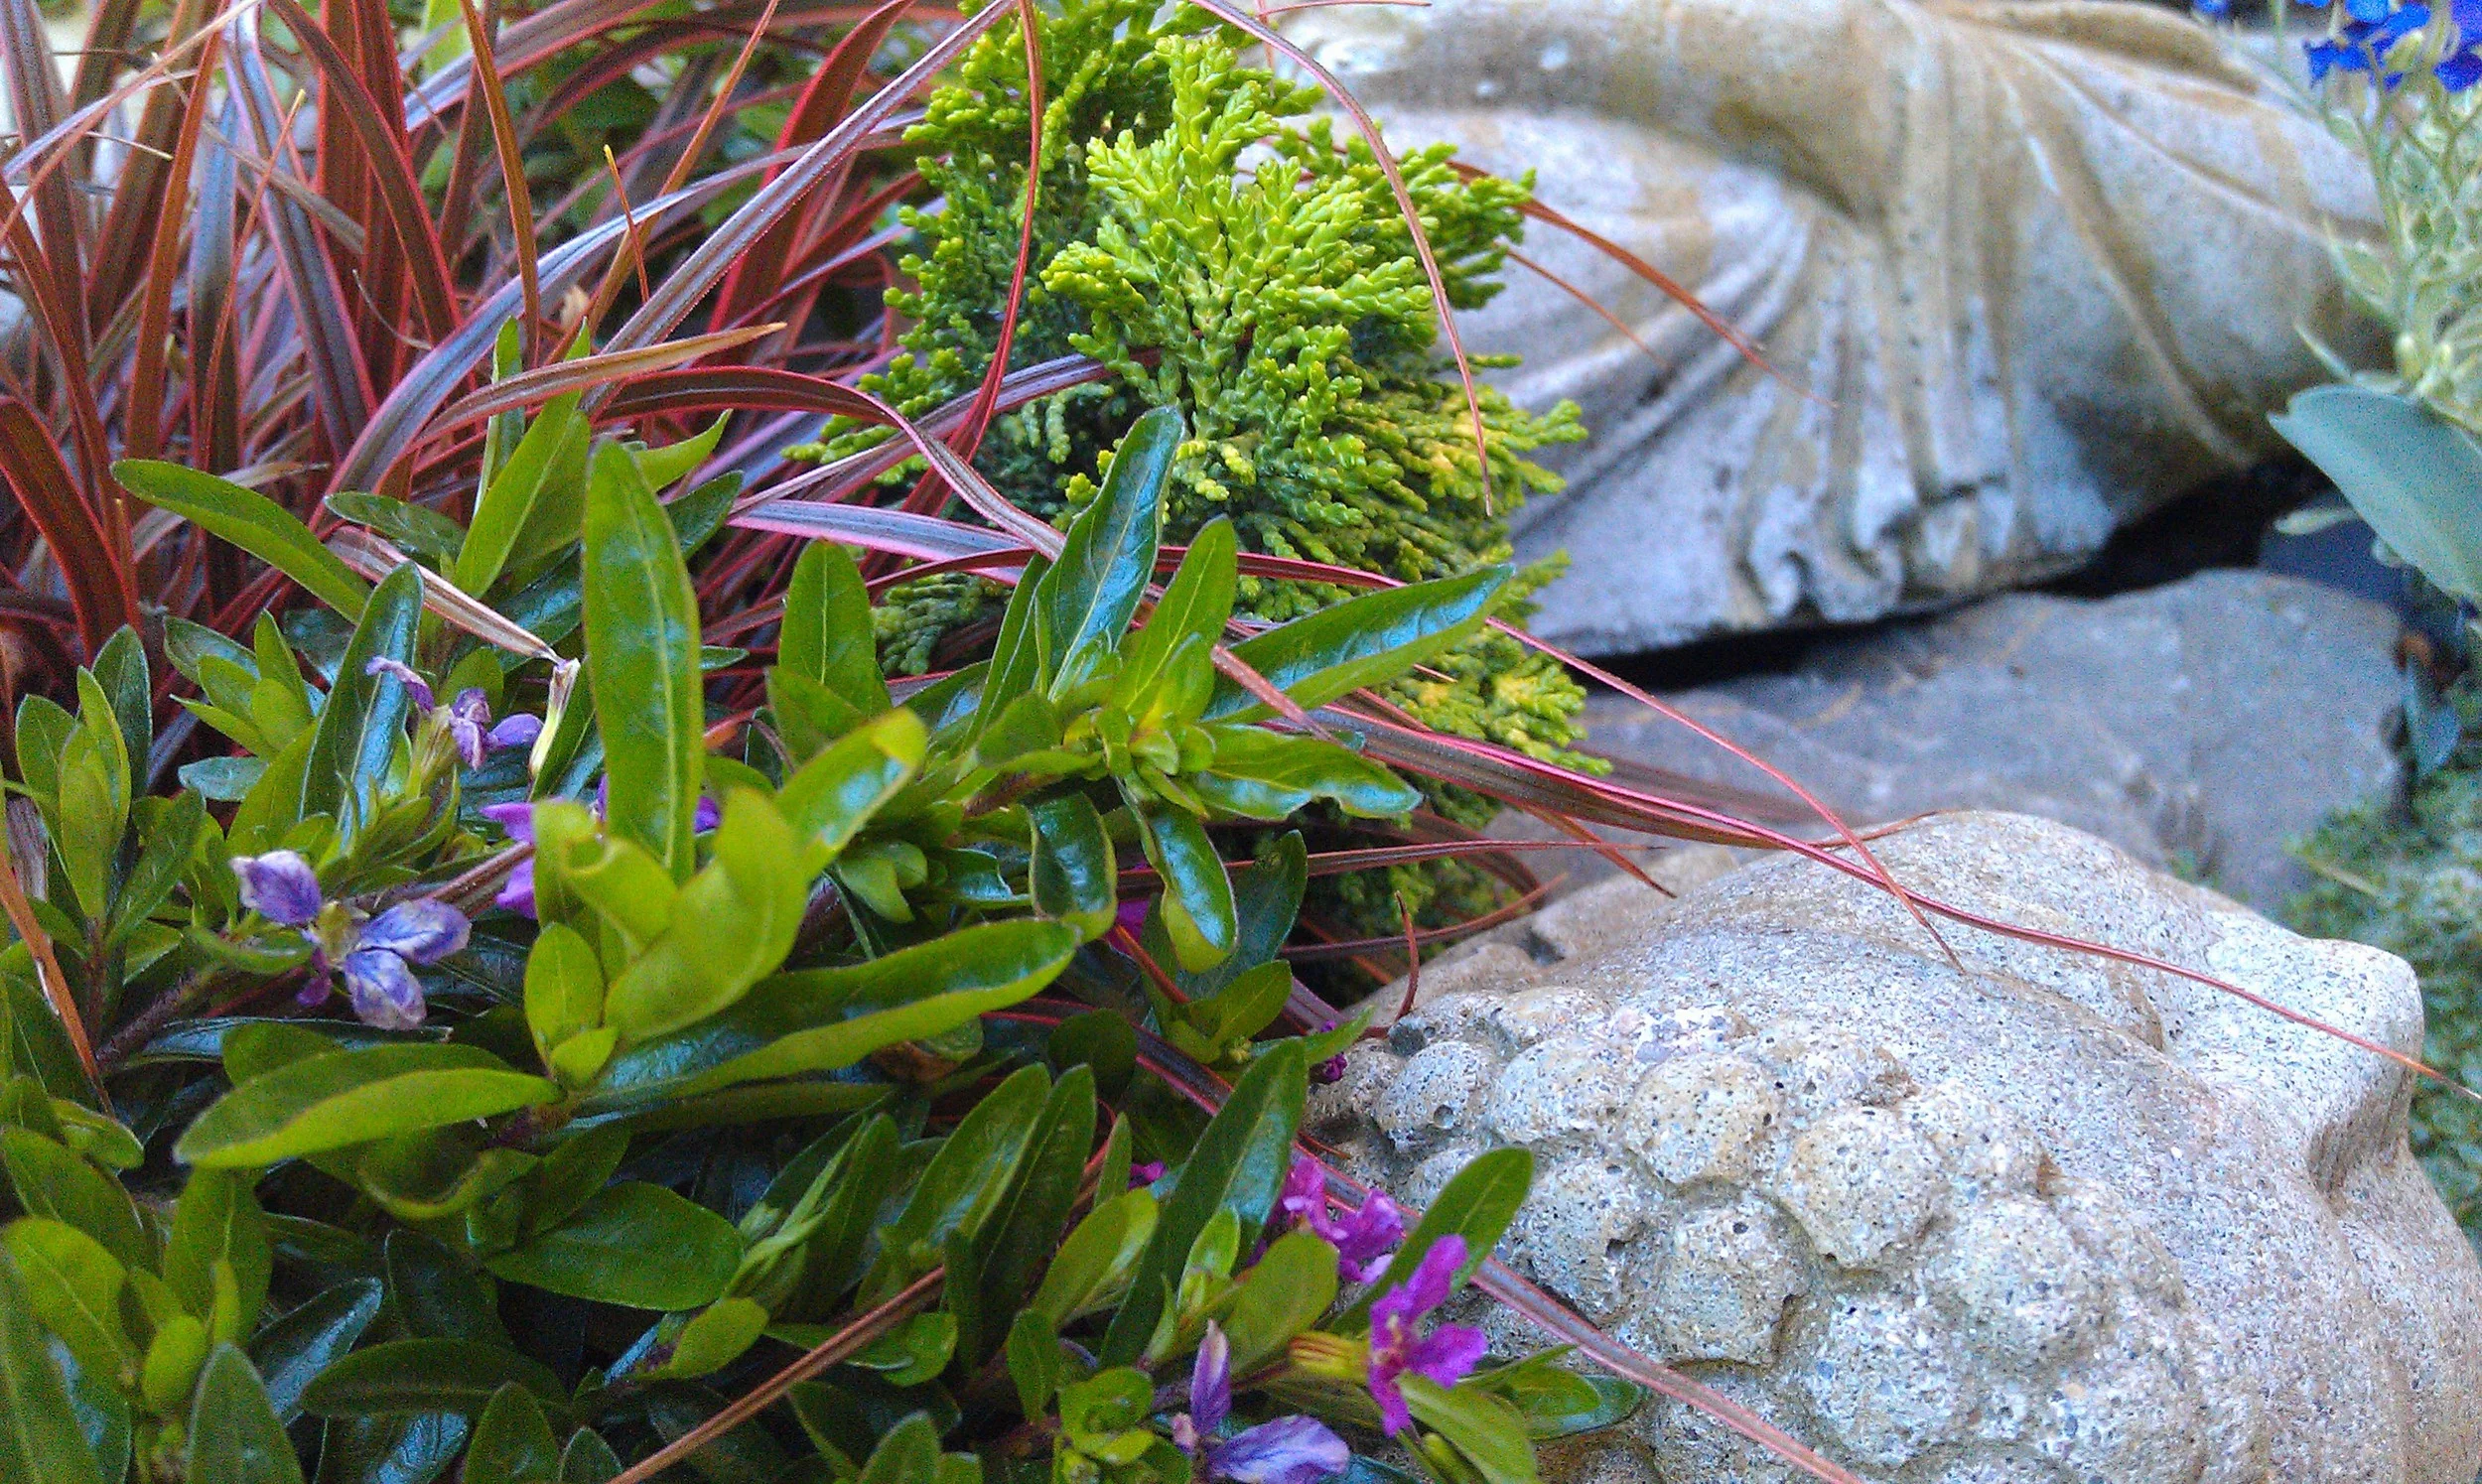
The Daibutsus my imagination paints are always in remote, inaccessible places, perhaps forgotten entirely except by a few devotees. The shrubbery around them is overgrown and ill-kempt, often obscuring part of the Buddha entirely. Imagine the mountain heights: a few wind-carved trees, some flowering shrubs clinging to the scant soil afforded them, a field of scree, and isolated patches of alpine wildflowers.
I try to avoid too much symmetry. The Buddha is placed a little off-center and slightly angled in relation to the pot. The plants are staggered and unevenly spaced. I contrast colors and textures wherever possible , so I don't wind up with all my fine-leaved plants on one side of the pot, or all my gold-foliage plants in a lump together.
In the picture for Step Six you see:
Buxus suffruticosa 'Tide Hill'
Chamaecyparis obtusa 'Rainbow'
Uncinia rubra 'Belinda's Find'
Cupeha 'Magenta Border'
Aubretia 'Dr. Mules Variegated'
Thymus minus 'Elfin'
Step Seven: Water It In

Water thoroughly the first time. Let it soak in, and come back and visit a few minutes later. You'll probably need to adjust the soil here and there, wherever the water has caused uneven settling.
I like to start watering this garden by pouring water into the Buddha's hands and letting it overflow into the soil, like a benediction. This is also a good way to avoid blasting soil out of the pot.
Step Eight: Make An Offering

This is the second Daibutsu garden I made this year. I particularly like the little stone platform in front of the Buddha; it looks like a good place to sit in contemplation and perhaps leave an offering to the Buddha. That's a little bouquet of Aubretia blossoms there on the stone.
This garden contains:
Eryngium venustum
Calluna vulgaris 'Flamingo'
Ophiopogon japonicus 'Nana'
Sedum acre 'Yellow Queen'
Sedum pruinatum
Step Nine: Take Pictures!
Nothing endures. Your baby plants will grow up, and eventually the illusion of the garden will be spoiled (Buddha would approve). So take pictures.
This is my first Daibutsu, circa 2012. It contains:
Polygala chamaebuxus
Calluna vulgaris ‘Hillbrook Orange’
Herniaria glabra ‘Marble Cream’
Picea glauca ‘Daisy’s White’
Pinus mugo ‘Paul’s Dwarf’
Veronica ‘Reavis’ [Veronica liwanensis x pectinata] (Crystal River® Speedwell)
And this is the demonstration garden used in this post, three months after planting:
The Aubretia and Cuphea are flowering, and the creeping Thyme is budded and ready to burst. The Uncinia has insinuated itself through the foliage of its neighbors, and even the baby Hosta has grown up a little. Things are getting nicely out of hand.
Given a little more time, Buddha's head (broken by the cycle of freeze and thaw, perhaps?) will be swallowed by the shrubbery. Soon, even Buddha's body will be half-obscured by vines and creepers.
Someday some enterprising hiker will stumble across an enigmatic smile carved into the stone, smoothed and half-obliterated by wind and water. With a little work, the hiker can clear the foliage to reveal the beatific face, lost in meditation, perhaps contemplating the mystery of how great worlds can become tiny and tiny ones, great.