Many moons ago, I tried to convince a boyfriend to let me grow food in his yard by tearing out the existing landscape (he declined and now has a vegetable bed in the worst place, which I secretly love). I have a habit of sizing up random yards, searching for the perfect place to grow food because sadly, I don’t have a yard or garden of my own. I’m relegated to planting any food I want in pots. It's honestly not my preference, but still, I like to think that I’ve perfected the art of growing in my microclimate. I know I share circumstances with many of you: without some pots on a patio, balcony, or windowsill, we would be plant-less. No fun. So, I'm covering container basics for urbanites looking to supply their kitchens with some garden goodness.

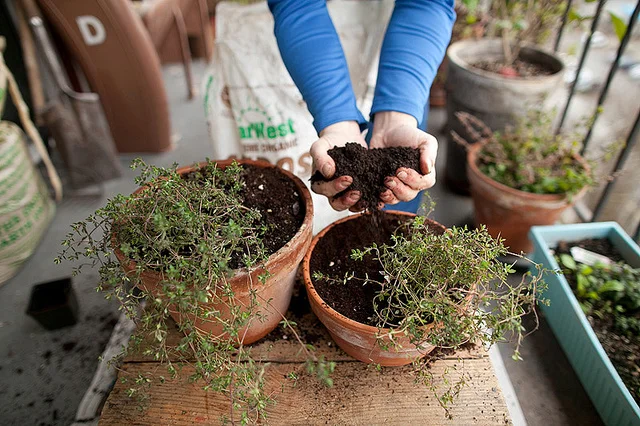
Planting thyme
Deciding What to Grow
You should know from the onset that not all vegetables grow well in containers. By planting in a contained environment, you are inhibiting the plant’s growth to some extent. Think about it -- plants can send out roots and root hairs only as far as the walls of the pot allow. Restricted by the pot, not all plants will come to full maturity and produce food. This presents the biggest challenge of growing food in small spaces.
The ultimate goal is for your garden to be productive. I aim for a constant supply of ingredients for the kitchen, so I nurture plants that can be continually harvested. I suggest growing plants that will be used frequently, but in small amounts. This gives plants time to regrow between cuttings -- no sense in planting a crop that you’ll wipe out in one go. (I figure it’s better to have something available over a long period of time).
• I rely heavily on herbs in my garden. Herbs will single-handedly change the flavor of most recipes and are often pricey at the grocery store; many are not commercially available.
• Plants that produce abundant quantities of ingredients that I know I’ll use often are also a favorite. Lettuces, for example. These are wonderful to grow at home. They take up little space, produce (and reproduce!) quickly, and offer fresh greens for salads, or for a nice leafy garnish. I use lettuce in large amounts, and their fast growing cycle makes them highly productive, economical, and worthwhile.
• Plan on mixing it up to make sure there is always something new and different to harvest. Choose plants that will run through their life cycle in one season (annuals) as well as plants that continue to come back year after year in the same pot (perennials).
• Make the most of what you grow by considering its uses beyond the kitchen. Lavender makes a subtle herb rub for seared duck breast and can also be used as an herbal stuffing for an eye pillow! Scented geranium leaves can be chopped and used in sweet recipes, infused into water for a facial toner, or steeped to make teas.
• A container garden should ebb and flow, just like a large garden. Some plants are grown for their leaves, some for their seeds, and some for their fruits. I try to round out my garden plan so there is always something ready to harvest. Today, as I write this, I have marjoram, thyme, and scented geraniums that survived the winter. Arugula and mâche are just popping up, too, having reseeded themselves from last year (at the end of the season I stopped harvesting their leaves and let them "go to seed" -- the matured plant grows seed pods that fall into the soil and regrow). Within three weeks, the lovage should be starting to show (the same plants I’ve had for four years) and I’ll be planting a second crop of arugula as well.

Forellenschluss lettuce in a long container
Getting Started
To start a garden in containers, you’ll need, at a bare minimum, pots, soil, and a low-level organic fertilizer. A bag of compost is also a great addition. Access to water is an important consideration. In my own garden, I fill eight old water bottles and carry them back and forth from my kitchen sink. Just make sure you have some way to water your plants, as containers require a diligent watering schedule.
Most plants need a little legroom to stretch their roots. Try to plant in a pot that’s a bit bigger than the plant will actually need. It is better to leave a little wiggle room than to have plant roots mashing up against the container walls. If you allow for some growth, you increase the odds of your plant growing to full maturity.
Materials
Plastic pots are the least expensive container option, so they’re great for anyone on a budget. It’s true that they are usually the least attractive option, but they hold their moisture longer than clay or ceramic pots and are lighter and easier to move around.
Clay pots are porous, so air moves easily through their walls. This is helpful in that it allows roots to breathe and keeps them out of direct contact with water, but it’s not helpful in that the soil tends to dry out quickly. In hot weather, you’ll need to closely monitor the moisture in your clay pots. Clay pots are a fairly inexpensive option for the home gardener after plastic pots, and they come in a myriad of shapes and sizes. If you choose clay pots, be sure to purchase a saucer or plate to sit under the pot. This works in two ways -- to keep moisture off the surface of your deck or patio and to hold in moisture for the plant.
I won't be discussing it here, but making your own pots is super rewarding, too!
Soil
You must use potting soil in your containers -- soil mixes are formulated to maintain a certain level of lightness so that plants are able to breathe, drain well, and still hold in some moisture. (Air is right up there with sun and water in importance to healthy, thriving plants!) Look for organic potting soil mixes from smaller regional companies rather than the national brands you’ll find in big-box stores. Swansons Nursery recommends Edna's Best Potting Soil for containers. Choose a potting soil without a lot of added fertilizer or nutrients. It is best to add those on your own as needed for the particular plants you will grow.
If you are adding new plants to previously used containers, do not rely on simply digging a small hole in the soil and stuffing in a new plant. Old soils often contain dead roots from previous plants. These roots will impede the new plant’s roots and constrict air as the new plant tries to grow in the same small space. For that reason, just as you would in a garden bed, it’s best to rework your soil before planting. As on the farm, till your soil using a fork or your hands. Loosen it up, remove the root hairs, then gently work in some compost and a spoonful of a low-level organic fertilizer before adding a new plant start.
A Few Favorites for Containers

Baby cornichons
Cucumbers
Cucumbers do well in containers because individual vines are prolific and will produce a decent amount of fruit even when given a small space. Growing in a large container will provide enough fruit to make any effort worthwhile (although ideally they should be grown in the ground, as their taproots will run down as far as two feet if given the chance).
Choose small varieties, as they will mature fairly quickly. Cornichons, gherkins, and other pickling cucumbers do better in containers than the larger slicing varieties.
Where and When to Plant
Plant out cucumbers throughout June in the Pacific Northwest (earlier in warmer climates). They don’t take super well to transplanting, but you can try starting them indoors in early May for a jump on the season.
Pot Size
Use a large pot for cucumbers, and sow four seeds per pot at the farthest corners from each other. A cucumber’s side roots, much like zucchini’s, tend to branch out widely in just the first few inches of soil layer, so a wide square pot offers the best space. Thin out any small vines after six weeks to allow the more prolific vines space to grow.
How to Harvest
Snap cucumbers from the stem when they are ready or use a flat knife to cut them off just above where the stem connects to the fruit. Small varieties are best harvested when they are just that—small. Don’t try to grow them larger, as they turn bitter and the seed membrane becomes weblike and unpalatable.
Lettuce
Whether you opt for butterhead, romaine, crisphead, or loose-leaf, lettuce is one of the quickest and easiest plants to grow. Little Gem (a romaine variety), Rouge d’Hiver (a cross between romaine and butterhead), and Oak Leaf (a loose-leaf lettuce) are all great choices. If
you’d like a summer lettuce, be sure to choose a heat-tolerant variety. If you know you’ll be planting in fall, a cool-season lettuce is in order. So you have flexibility, purchase a variety of lettuce types at the beginning of the year and sow according to the season.
Where and When to Plant
Lettuce can be sown almost any time of year, depending on your climate, so it’s best to read the back of the seed packets to determine the timing that is best for each type.
Pot Size
Sow seeds in a long, shallow, pale-colored plastic container, since lettuces are shallow-rooted, and plastic containers hold water a bit longer than clay ones. Smaller pots tend to heat up faster than a large deep pot, so choosing a light color helps keep the roots cool, as well. Be sure to keep the seedbed moist until seeds germinate, which typically happens in five to seven days.
How to Harvest
To harvest lettuce, try to remove the larger outer leaves first. Using a small pair of scissors, cut the individual leaf stems as close to the base of the main stem as possible, leaving some interior leaves behind. These leaves will soon fill in and become outer leaves; thus you’re creating a cycle of lettuce leaves to harvest. If you prefer to harvest full heads of lettuce, do so when the heads are full and the outer leaves are starting to yellow and wilt, but know that if you cut the entire plant, the odds of its regenerating are reduced.
Anise Hyssop
The unique flavor of anise hyssop is part licorice, part mint, a little bit like honey—herbal perfection. It is nice in grain salads and as a digestive tea or tisane after a big meal or between courses. This herb can be grown from seed or starts, but starts can be more difficult to find. The plant grows tall, sturdy stalks topped with vibrant purple flowers. Anise hyssop is a perennial and will come back year after year.
Where and When to Plant
Anise hyssop can be sown in spring, directly in a pot. The seeds are super tiny and need only be pressed into the soil. Because the seeds are so light and small, anise hyssop tends to spread seed liberally after it flowers. Expect it to crop up in other pots the following year. I let these stray seeds grow to small seedlings before I repot them or give them away to friends. Anise hyssop likes sun but will do well in partial shade with at least six to eight hours of sunlight.
Pot Size
Anise hyssop appreciates some room to grow, so select a deep pot. Flower stalks may reach over two feet tall, and the extra depth helps the plant to grow high. Shoot for a two-foot depth and about that much width on a pot.
How to Harvest
Cut off an entire stalk just above a leaf line. When the plant flowers, cut back the entire main stem, as it may regenerate growth.