

Part 2: Thinning
Last post, I explained the basics of heading back. Now let's look at a quick spring thinning of that beefy magnolia I mentioned before, and other ornamental trees and shrubs (examples: Japanese maple, snowbell, rhododendron, camellia, etc.). If there is a “secret” to thinning trees and shrubs to look their best, it would be this:
Prune from the inside out, bottom to top.
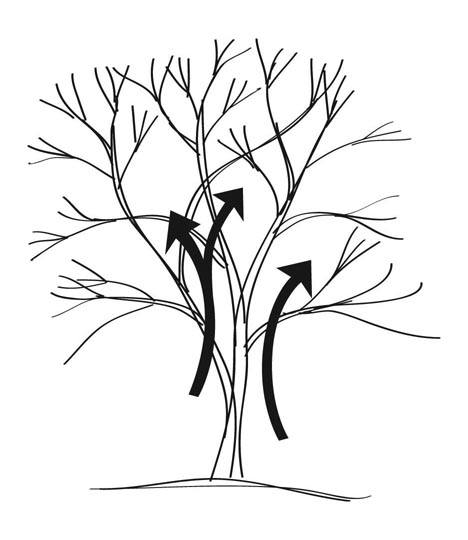
Within this advice is the idea that you should try to direct and enhance the natural growth of plants instead of trying to “control” your plants or beat them back. You are not creating beauty — you’re simply revealing it.
In my pruning seminars at Swanson’s I try to emphasize three basic steps:
Clean out.
Thin to a balanced density.
Shape and layer.
Even if you only do the first two steps, your plant will look dramatically better. The increased light and air circulation will improve its health, and fewer families of critters will be tempted to live in there. The third step is about fine-tuning the natural look, so in our quick version you may not have the time or confidence to go that far (best done in Summer, anyway), but I’ll briefly discuss it.
Cleaning out largely involves removing any branches or other tissue which are obviously dead, broken or diseased. These can be removed any time of year you find them.
Then we start thinning from the inside out. Get your hands, or — if it's a big enough plant, and you’re physically able — your whole body (wearing gloves and safety glasses) into the middle of the plant. It’s the best way to reach and observe the plant’s structure. You’ll likely find dead branches in there which have been naturally shaded out. Cut or snap these off.
Then you can start with the smallest live branches inside, especially ones which cross or grow through the middle of the plant. Some plants such as weeping maples have naturally crossing, curving branches, so don’t always assume that they all have to go. On an extremely dense plant which hasn’t been pruned in years, you might need to literally cut your path into the plant (ideally from a lower or rear side that’s not too conspicuous). But that’s rare.
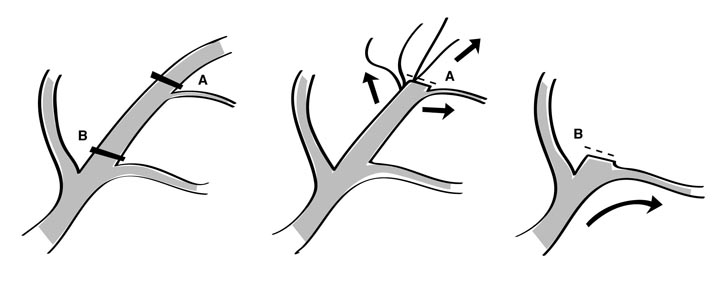
Remember to cut back any woody stubs as short as is practical, without damaging the tissue of the originating branch. Cut back to a side branch at least half the diameter of the branch being cut. This redirects growth into a side branch and leaves less of a dead end to sprout out or die off.
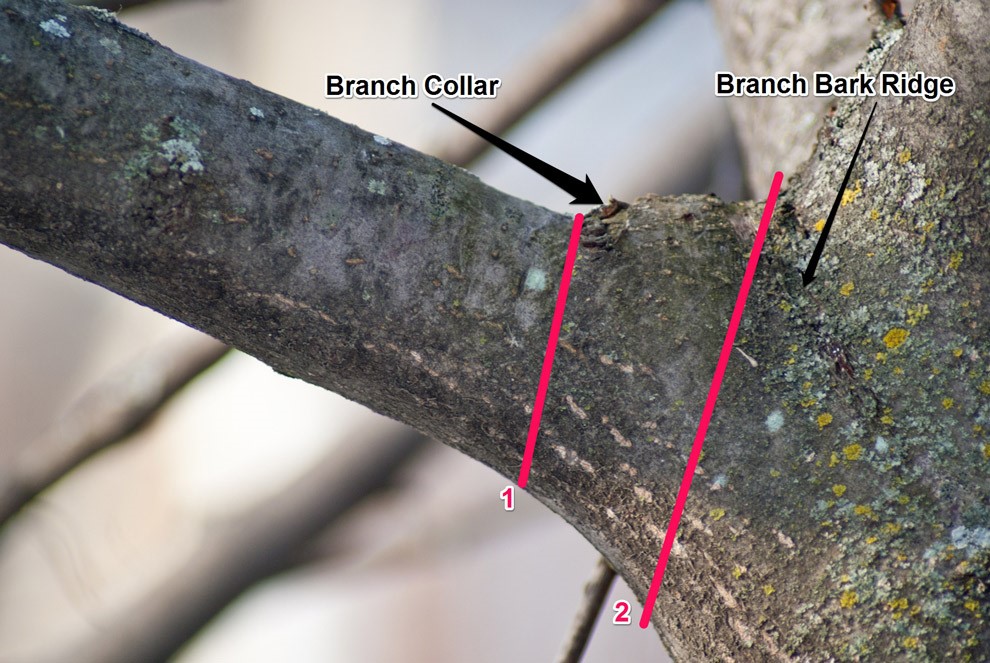
Larger branches often develop a swollen collar which should never be cut into. Best to leave a little longer stub to avoid these and allow proper healing. In the photo below, cut #1 is best; cut #2 would damage the branch collar and harm the tree.
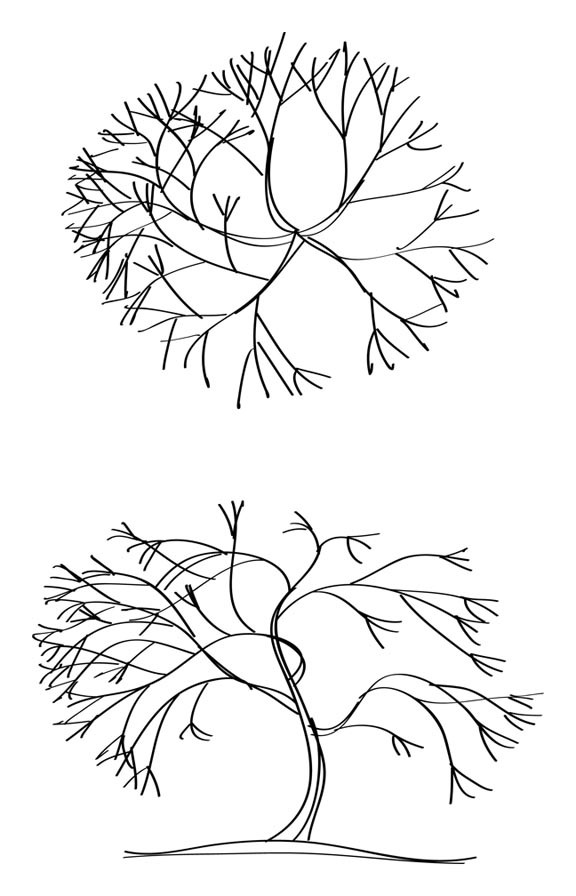
Cut a few branches randomly out of this dense center, then step back to see what difference it is making. Can you start to see through it more than when you started? If not, keep going. If so— and you feel it's enough for now — move on to another clump and start thinning to achieve approximately the same density throughout the plant. Work your way all around the plant (preferably at least twice). It doesn’t take a lot of time to make a big difference!

You don't need to remove every last tiny branch inside the plant. We're trying to improve the transparency, not hollow it out completely. Just remember, it's wise to take out less than you think you need to. Plus, it’s Spring — we want quick and minimal. You can always come back in Summer and thin more. If you can now see much better through the plant, including the main branching structure, you can stop and admire your newly discovered talent!
Shaping and layering is largely about making more thinning cuts and redirecting future growth to enhance the natural form of the plant. As with heading back your shrubs, try to preserve the essential branching character of the plant: upright, horizontal or arching. The more familiar you are with your individual plant’s habits, the easier this will get. Again, you can do more of this in Summer.
Many of these principles of thinning and heading can apply to pruning other plant types as well (perennials, roses, vines, fruit trees, to name a few), although each of these have specific pruning needs which could easily take up their own blog.
Want to learn more? Swanson’s offers several free, introductory seminars on pruning various plants throughout the year. Visit our What's Happening page to see what’s coming up. Also, several other local nurseries and organizations - namely Tilth Alliance, PlantAmnesty, and the University of Washington Botanic Gardens - offer pruning classes for a variety of skill levels.
I hope these ideas can encourage you toward a somewhat tamer start to the gardening season!