
Pruning a Japanese maple tree is not necessarily difficult, but may be intimidating at first — particularly for a weeping or “laceleaf” cultivar (Acer palmatum Var. dissectum). We might perceive it as fragile and delicate, and we’re afraid to mess up its natural beauty through improper pruning. We might peek inside and see an impenetrable tangle of branches. We know we don’t prune it the same way we would a fruit tree or hedge. Where to even start? Why must we prune at all???

Why Prune?
In simple terms, we prune a plant to:
1. Enhance, or merely reveal its natural beauty.
2. Improve its health and/or productivity (of flowers or fruit), primarily through allowing greater circulation of air and sunlight.
3. Redirect growth energy toward where we want it to grow.
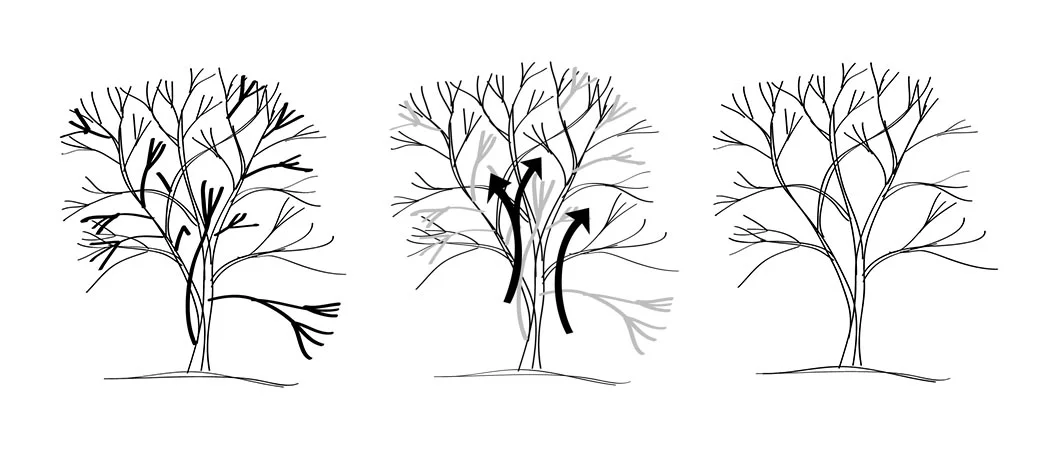
"Redirect growth energy" can mean cutting one of two branches so the growth tends to go left instead of right. Or more horizontal instead of downward. Or removing certain branches growing through the middle of the plant to encourage a more open habit. These are all thinning cuts.
"Redirect" can also mean nipping back long, leggy shoots to force more side branching or fruiting spurs. Or shearing the face of a hedge to force more dense internal growth. These are heading cuts, sometimes overused to control the size of a plant. The risks of controlling size are discussed below.
I like to say that we prune a plant to encourage it in a healthy direction and help it physically and visually “breathe.” Along with “encourage,” I tend to describe pruning with such terms as "nudge" or "persuade," rather than "force" or "control."
Japanese Maples
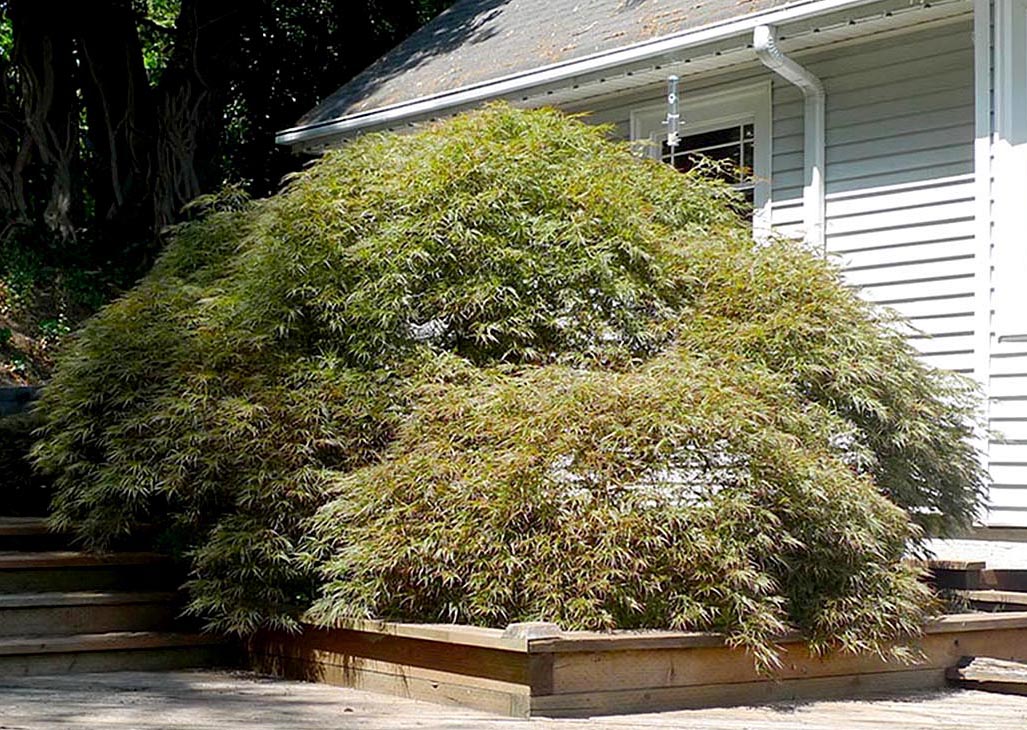
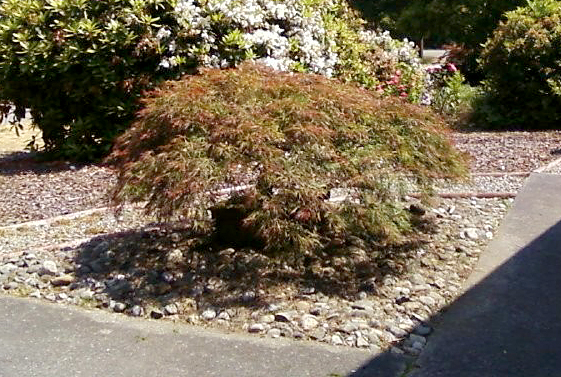
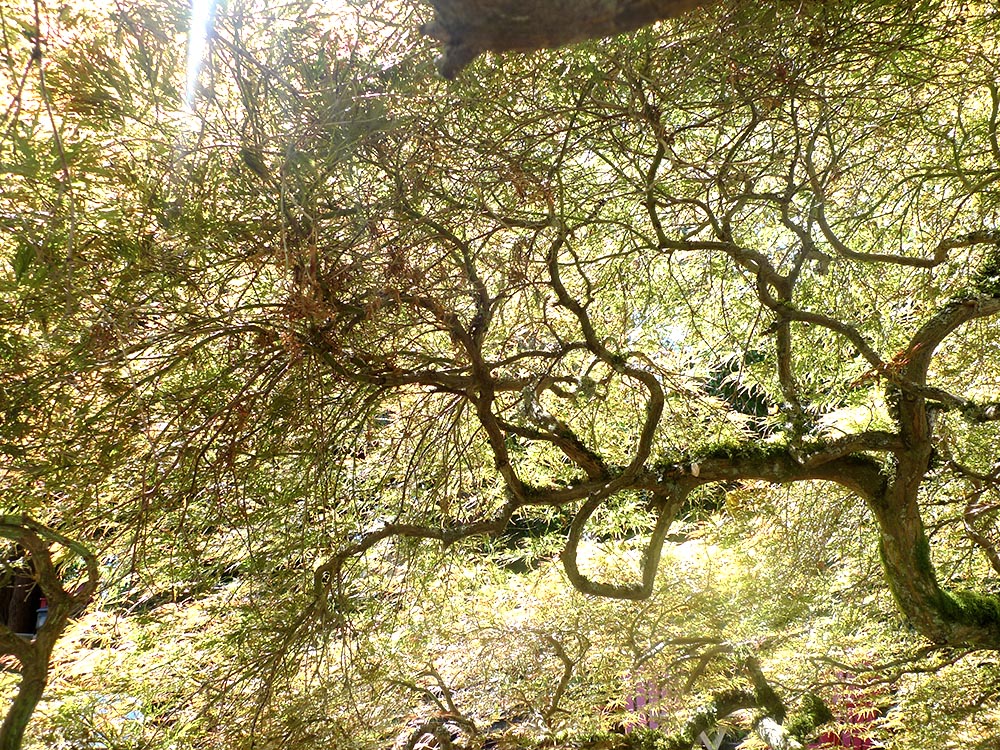
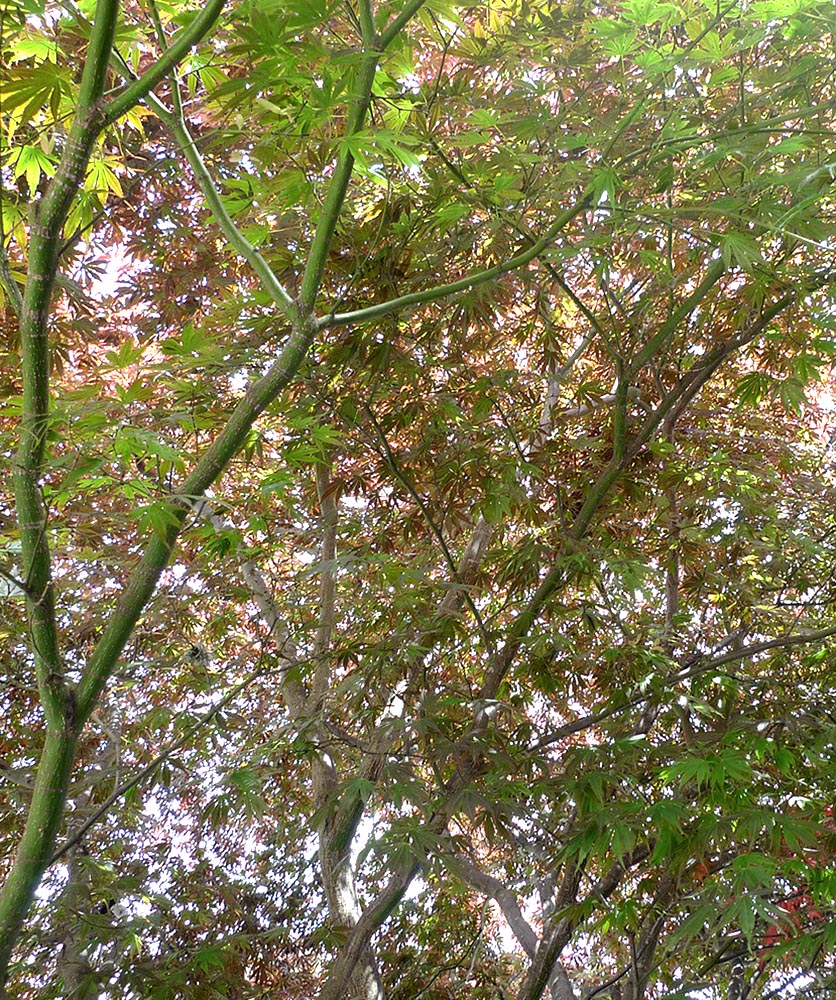
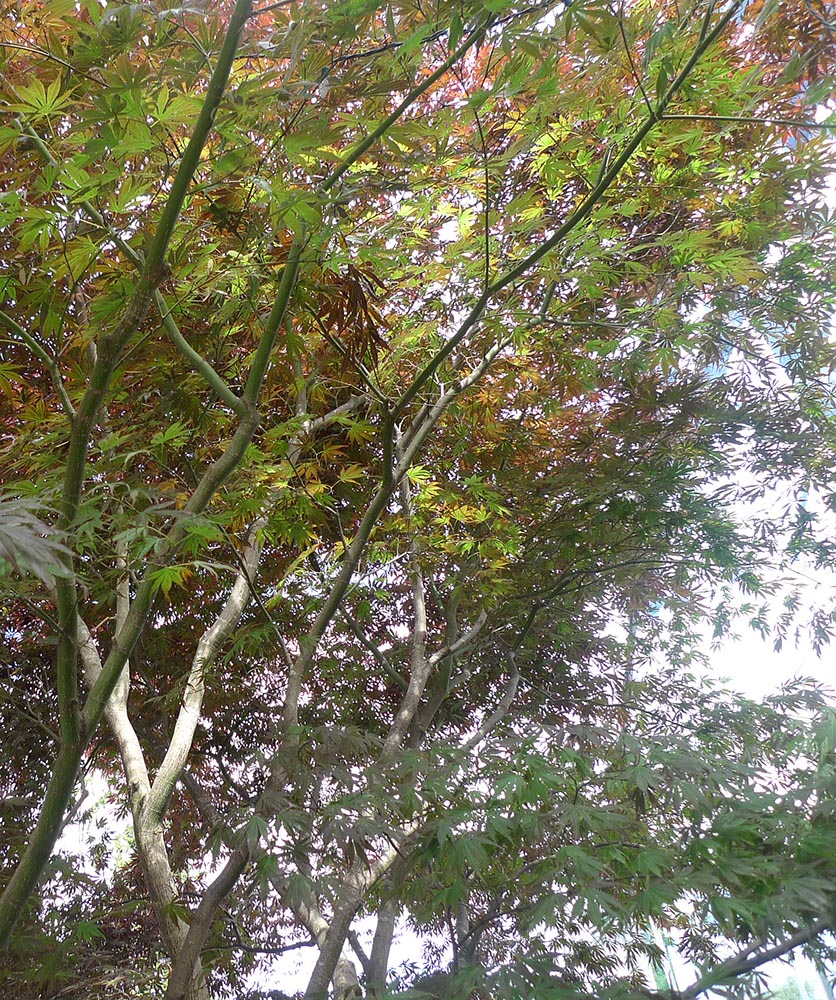
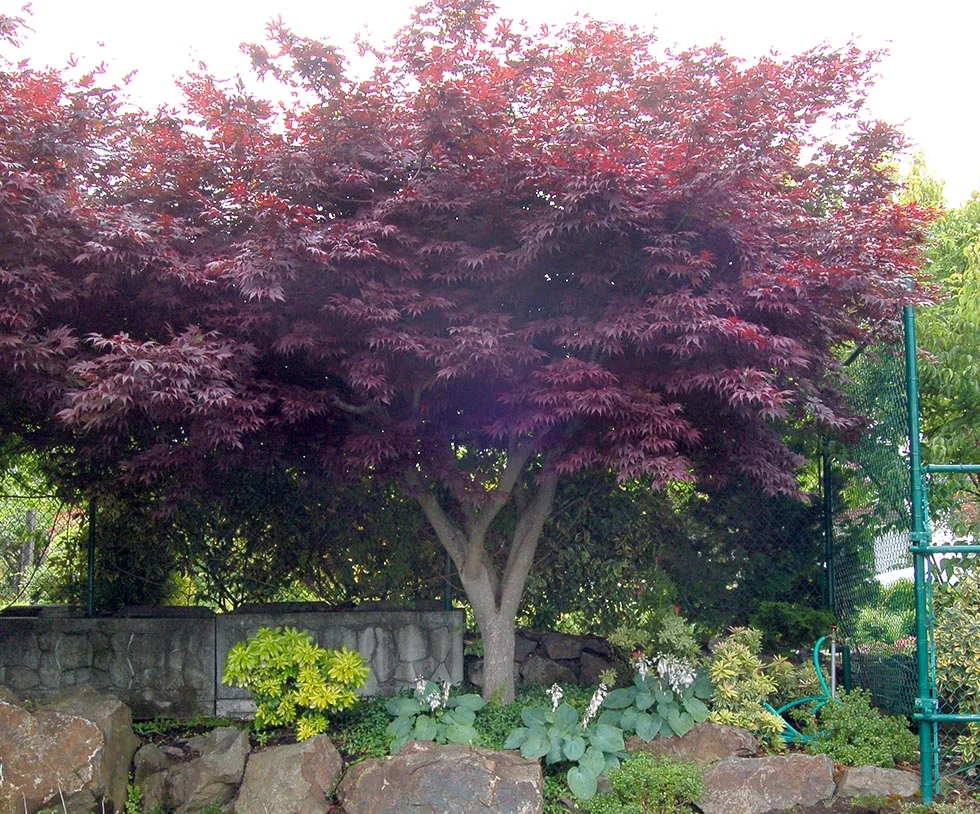
Japanese maples are naturally beautiful but can grow so dense as to obscure their elegant or exotic branching structure. Interior branches get shaded out and die off — not necessarily an unhealthy situation but they add to the clutter. The weeping forms, especially in full sun, can grow into opaque, amorphous mounds, inviting such unflattering nicknames as “mushroom” or “Cousin It.”

Most maples look best with periodic thinning to open up their centers, make them more translucent, and reveal their structure. Sometimes they need a few heading cuts if there are long, outer branches. Young trees may need such heading or a little redirecting of awkward branches, but go easy — there will be plenty of future opportunities to guide them as they grow.
A couple of notes: 1) The principles for thinning Japanese maples also work for a host of other broadleaf ornamental trees and shrubs, especially those with attractive branching. 2) If you are new to this, especially for very dense trees, you might first try thinning it in winter (late Nov. - Feb in our region) when you can more easily see the branching structure. You can do more "fine tuning" in summer.
Three Questions To Ask
I constantly (if subconsciously) ask myself three questions when pruning:
1. What does this tree want to do?
Determining what the tree wants is a combination of research and observation. If you know the actual species and cultivar, you can know what mature size and growth habit it usually attains. If you can't get that information, you can still get clues about what it wants to do by observing its habit over recent history. Has it barely grown three inches from where you cut last year, or launched 3-foot-long whips? Does it seem to want to sprout from bare branches and grow more dense, or shed all its interior branches and stretch out into more of a leggy look? In a shaded setting, is it determined to grow one direction to reach more light? These tendencies should all be considered for what to redirect through pruning.
2. What do I want this tree to do?
As for what you want, is that branch headed in a good direction, or right for the house or a neighboring shrub? If it tends to grow either denser or more open, is that acceptable? Or, do you want to open up a dense tree (usually a good idea), or make an open tree a bit less leggy? What’s needed to help the tree breathe?
And are you okay with the tree reaching its typical mature size? You can alter the tree’s natural habits to a small degree, but if you try to keep it significantly smaller (more than 10 to 20%) or different in habit from what it is genetically “programmed” to do, you might create a misshapen, wild-sprouting beast. There are unfortunate examples out there of Japanese maples which have been sheared or pruned way too aggressively.
3. Where shall I start pruning (or, where shall I cut next)?
One way to start is by lightly heading back any long branches on the tree’s perimeter which might crowd neighboring plants and structures or touch the ground (especially in the case of weepers). It’s an easy task to “warm up” and get to know the tree a bit before wading into the interior for the main event.
For the interior, ask yourself: where’s the biggest, most dense section to declutter? Clean out and thin this zone to make it less dense (details below), then... "Where shall I cut next?" Answer: the next most dense zone you find, and so on.
Three Steps: Clean - Thin - Shape
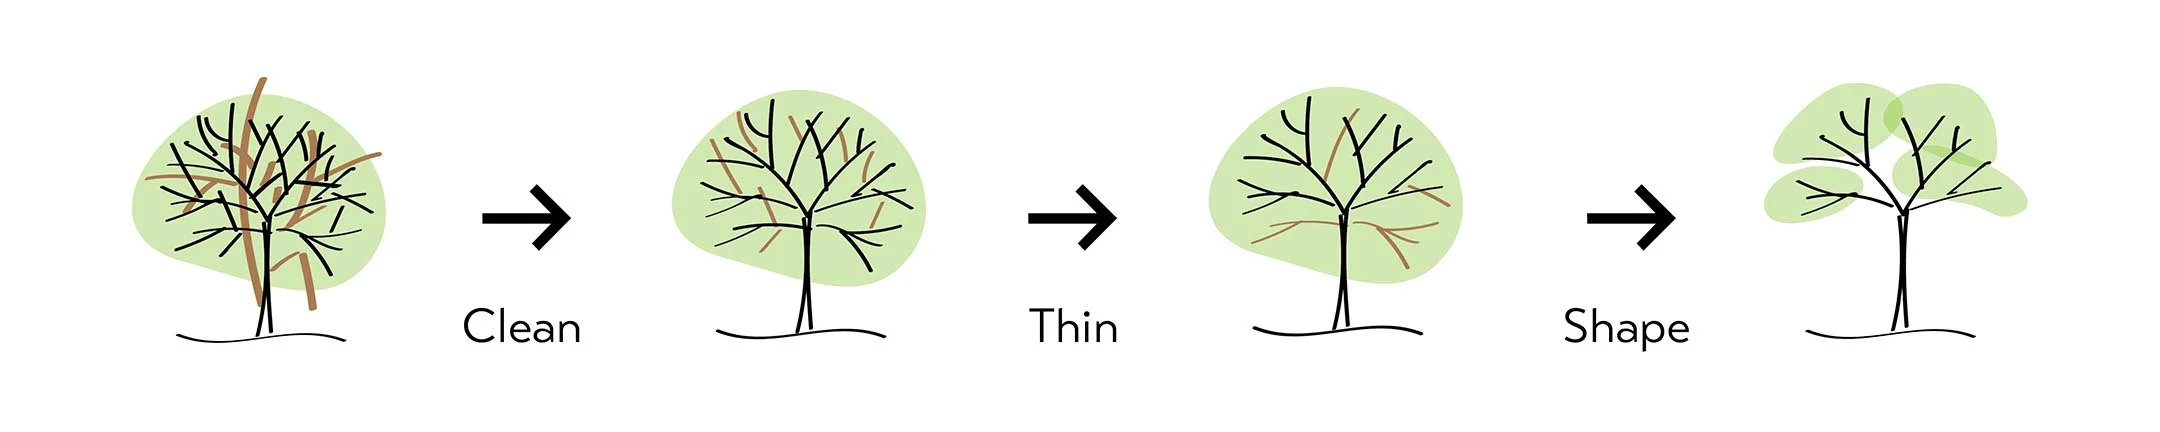
1. Clean Out: Remove branches which are dead, broken, crossing (within reason — some crossing may be unavoidable).
2. Thin: Open up light and air circulation. Balance the branch density around the tree.
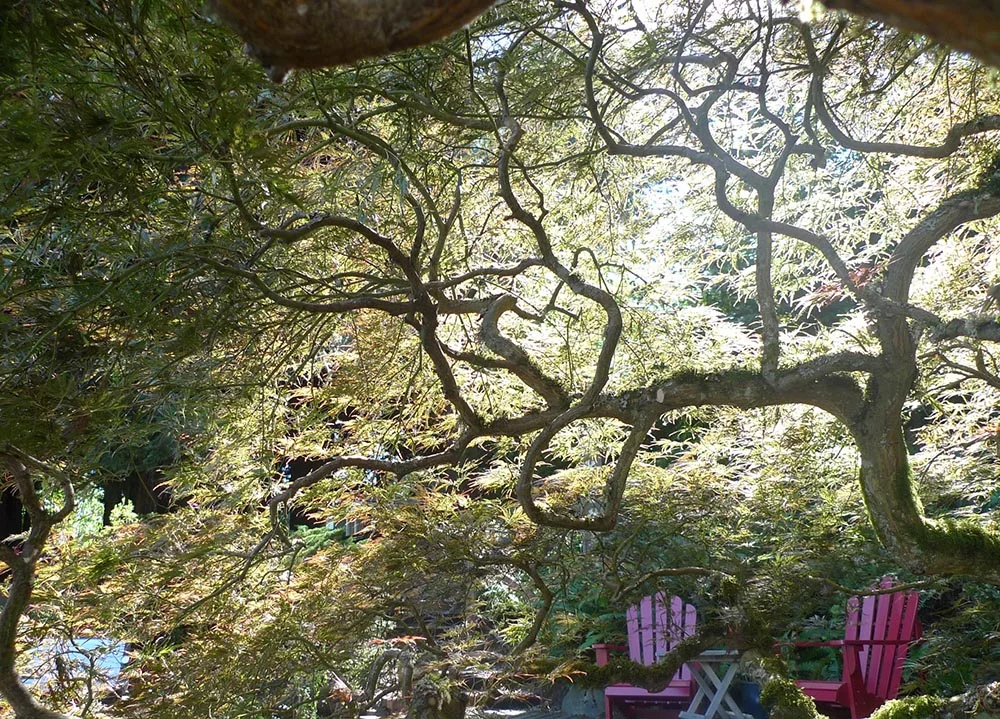
3. Shape or layer: Create “clouds” & spaces between them. Preserve foliage masses at the ends of major branches. Open up views of attractive/unique branching inside and perhaps views through the tree.
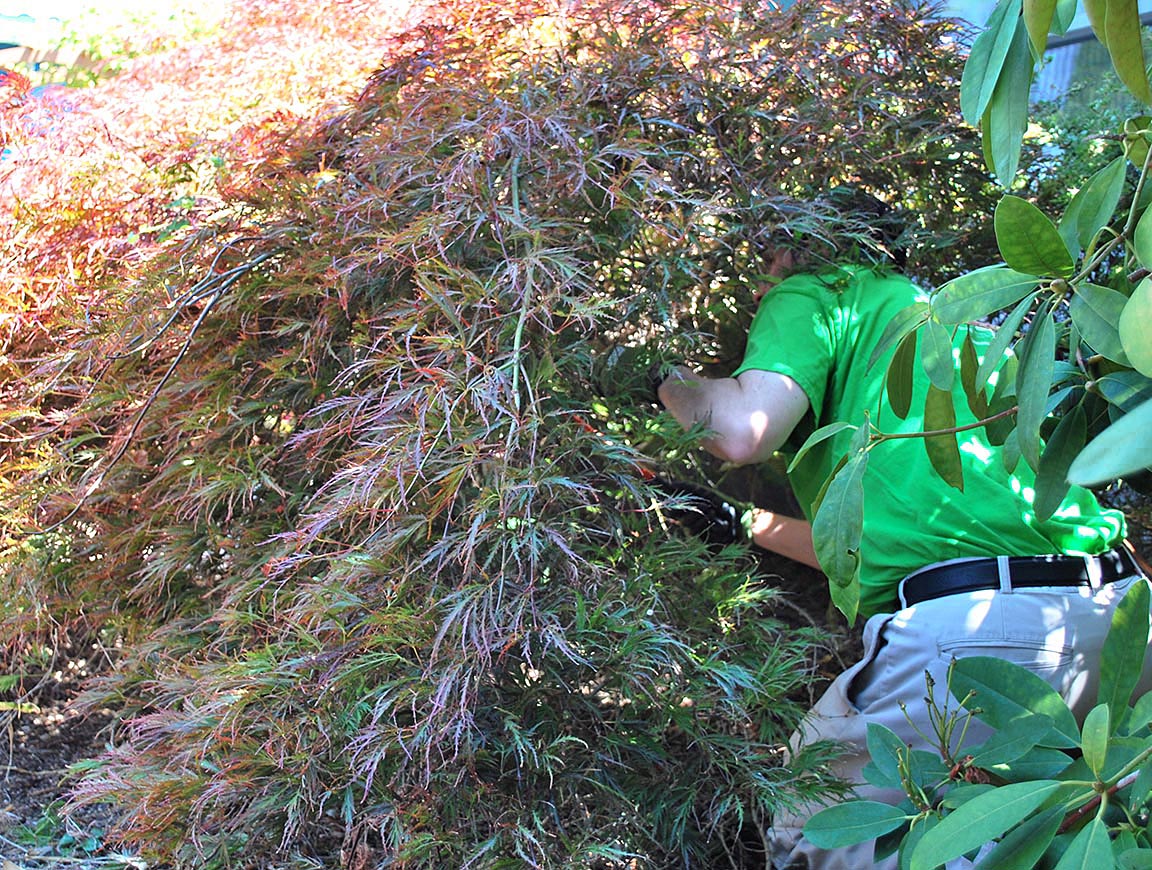

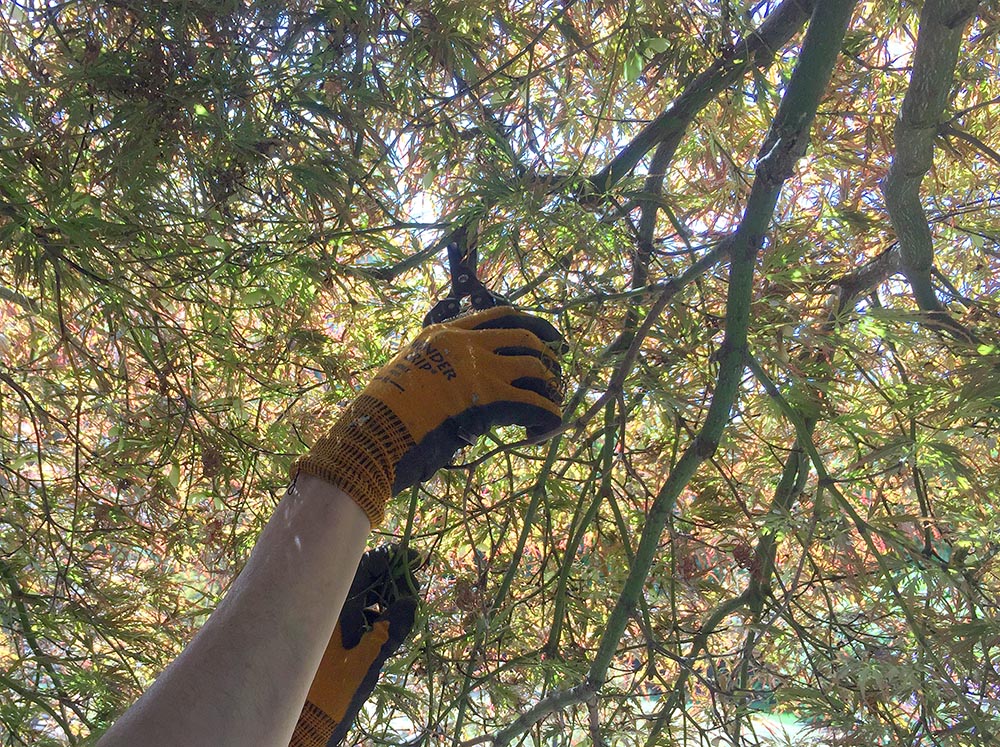
Clean out:
If the tree hasn't been thinned in a while, its interior will almost certainly include dead branches, branch stubs and leaves which have been shaded out. Get your gloved hands (or your whole body, if it's a big enough tree) into the middle of all that dense stuff, and snap (if very small) or cut off any dead material you can reach. You might not get them all; the goal is to minimize. If you need to snip or saw off larger dead branches, do so, but remember they can be quite brittle. Use the same care and precision that you would on healthy branches.
Do the same for any branches which are broken or showing wilted leaves. Also, we generally eliminate crossing branches — removing one of any two which cross each other to the point of touching. This prevents damage from them rubbing wounds into each others’ bark. For stiff, twisty branches on a weeper, some crossing branches may be essential to the character of the tree, and not likely to move and rub against each other, so it’s not as necessary to remove them all.
The clean-out step can be a messy, uncomfortable job, but well worth it. If you do nothing beyond this step, your tree will still look much better. If it hasn't been pruned for several years, it can be a dramatic improvement. But you might still have a lot of dense stuff that is living tissue, so we move on to Step 2.
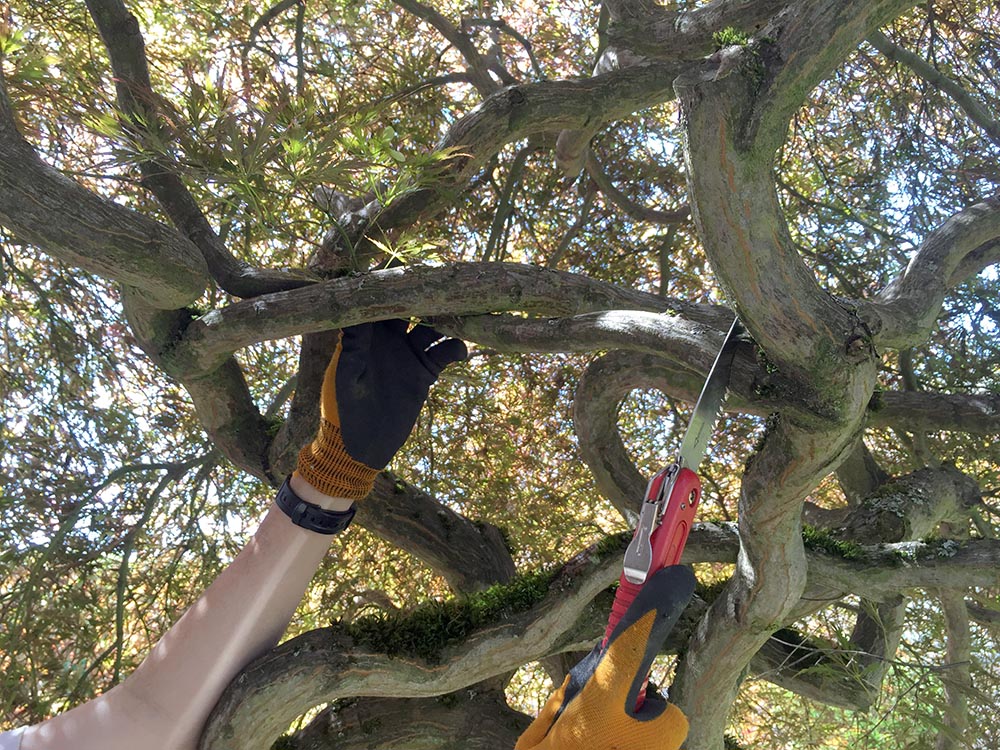
Thinning from inside out.
Thin:
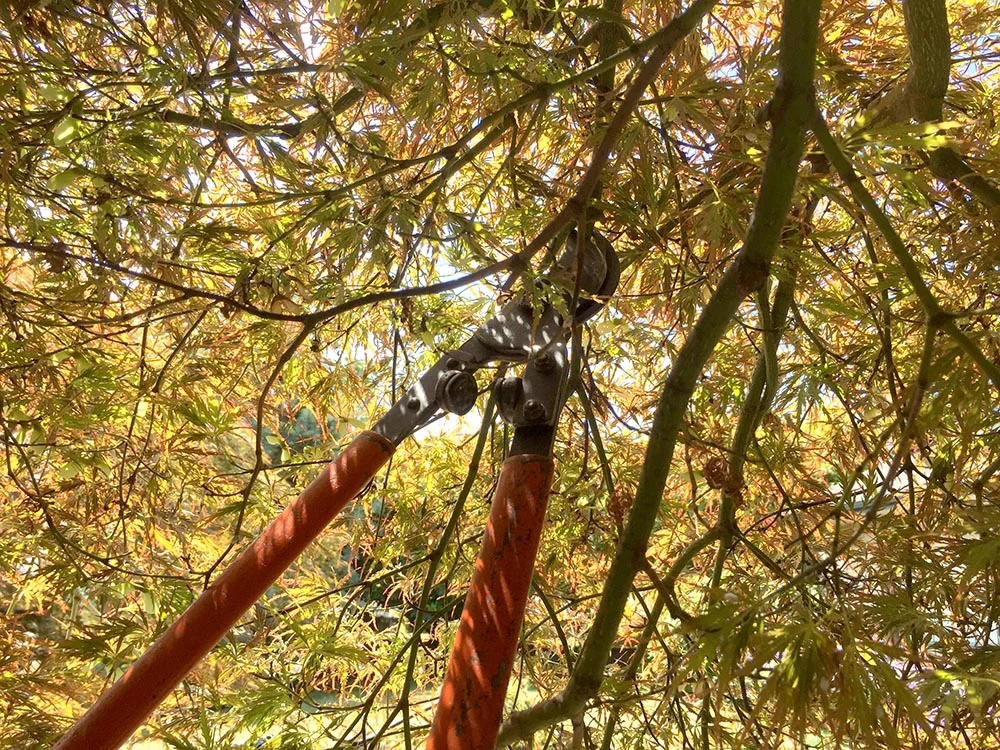
Back inside the tree canopy (if you can) look for that most dense zone and find the smallest branches there. On a small weeper, this might be anything under 1/8" in diameter. On a large upright tree, it might be 1/2" diameter or smaller, but size is relative, of course. It might look like a hopeless tangle at first, but have faith — Rome wasn’t pruned in a day, but one cut at a time. Okay, I made that up just to see if you’re still reading.
Start removing small branches at their base (where they branch off from a larger branch). Some might be small enough to snap off by hand. Cut a few branches randomly out of this dense zone, then notice what difference it makes in the density. Can you start to see through much more than when you started? If not, keep going. If so, and you feel it's thin enough for that zone, move on to another zone and start removing small branches there to achieve about the same density. Don't remove every last tiny branch inside the tree — the goal is to improve the transparency, not hollow it out completely.
You can remove larger branches as the their need to be thinned becomes more obvious, and as you feel more confident. You may realize that instead of cutting three small branches, you could get the same result by tracing back to the origin of those branches and cutting one larger branch. Deciding which branch to remove can be random early in the thinning process, more intentional toward the latter stages.
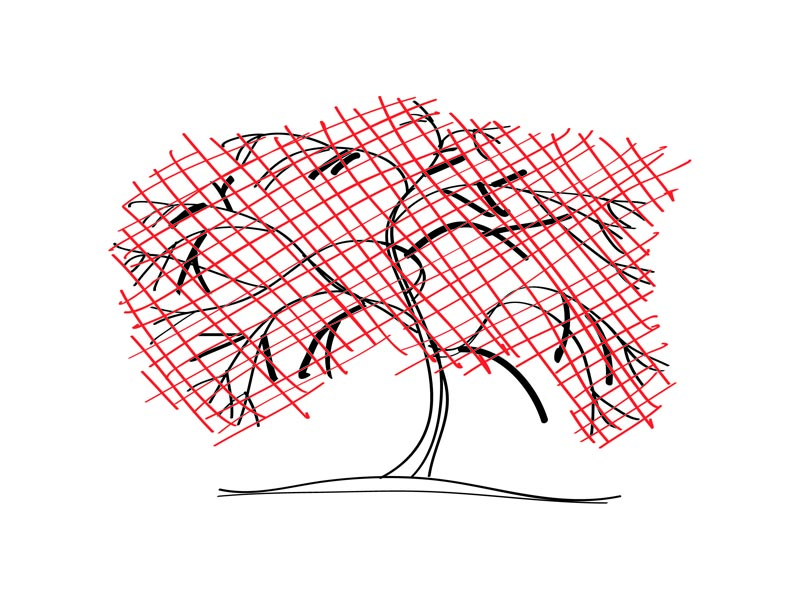
Shape:
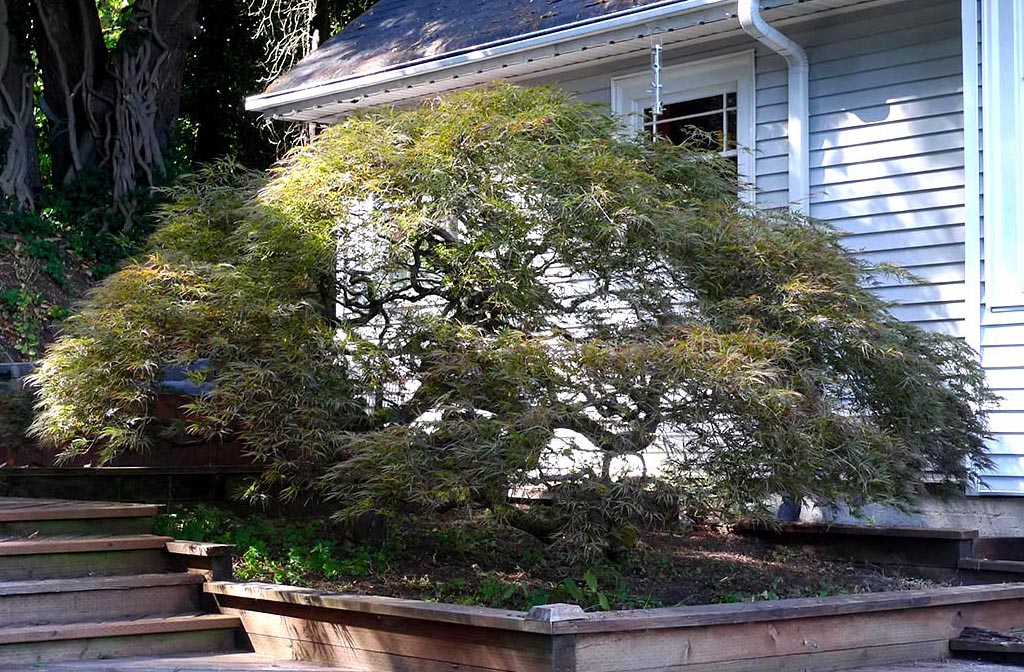
We've improved health and transparency (visibility of the branching structure) with the clean out and thinning. Now we might wish to reveal the tree's beauty even more. Shaping is largely about identifying masses or layers or branches and foliage, and thinning some more to open up space between them. Observe how, even after cleaning out and thinning, there may still be variations in branch density around the tree. You can see through the thinner areas easier. You can choose to open up those thinner areas a bit more, creating some separation between the denser zones — gaps between the "clouds."
The decisions about which branch to cut are more intentional than the random cutting in the earlier steps, but the technique is the same — removing one branch at a time at its base and observing how much it thins the density there.
After any of these steps, you might decide to stop and enjoy the progress you’ve made on your tree. You can always come back and do a little more after you’ve observed other pruning needs, or after you’ve gained more confidence. But it’s always better to prune less than you think you need to. An over-pruned tree can recover, but it might take a few years to look right again.
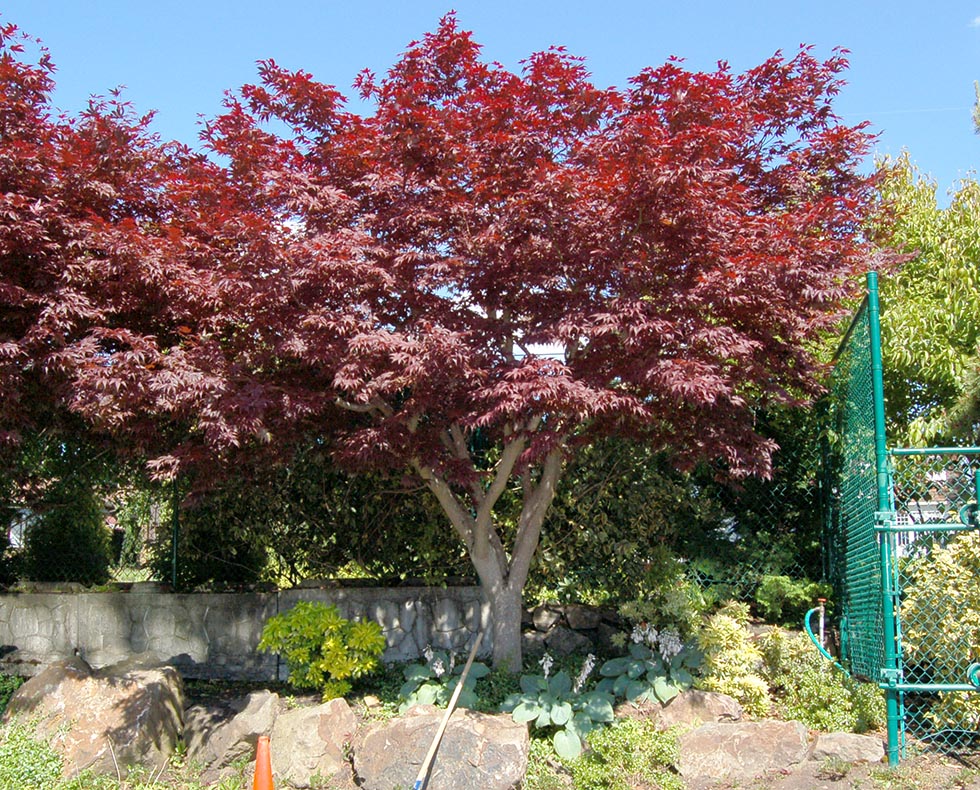
Do you see quite a difference? Does your tree seem to “breathe” easier? Then you’ve successfully pruned it, and now you have an idea of what to do in the future to keep it healthy and looking spectacular!
Miscellaneous Pruning Wisdom
Work from the inside out, bottom to top, small branches before larger.
Work around the plant at least twice (if possible). You will notice different details each time.
Minimize any dead-end stubs. But avoid cutting into the base collar of a branch.
Always do less than you think you need to.
Try to anticipate the direction of future growth.
Learn more about the general pruning principles described here by reading these pruning posts: Pruning 101,Spring Pruning: What Should I Do?, and Spring Pruning Part 2: Thinning.
[All images by Swansons Nursery and/or Dan Gilchrist.]