Editor's Note: Photos by the author except as indicated
From time to time even the best gardeners discover that they have planted something in the wrong place: too close together, too close to the house, too much sun or shade, and so on. Well, it's never happened to me, of course, but I've heard stories...fortunately most of these errors can be corrected with some planning, the right tools, and varying amounts of sweat equity.
"Right plant, wrong place...."
The best time to transplant trees and shrubs is during the dormant season, which in greater Pugetopolis means roughly mid-October to mid-March. That being said, some broadleaved evergreens such as rhododendrons can be moved just about anytime they aren't pushing out new leaf growth, and I have seen aged specimens of those little shrubby Japanese maples (the ones that resemble un-groomed sheepdogs) moved during the peak of summer. But moving plants during the growing season comes with a considerable number of challenges, the conquering of which are beyond the scope of this article.
If you have enough advance notice, root pruning can significantly increase your chances of success. Timing is important; plants which will be moved early in the dormant season (October and November) should be root pruned the previous late winter (February or March). Plants which will be moved in late February or early March should be root pruned in early October. Using twine or bungee cords, carefully tie up the branches as if you were preparing a Christmas tree for shipping. Then grab a (sharp!) spade and cut an 8" wide, 10" deep circular trench just outside the width of the desired rootball, using pruners, loppers, or a saw to sever any roots larger than 1/2" in diameter.
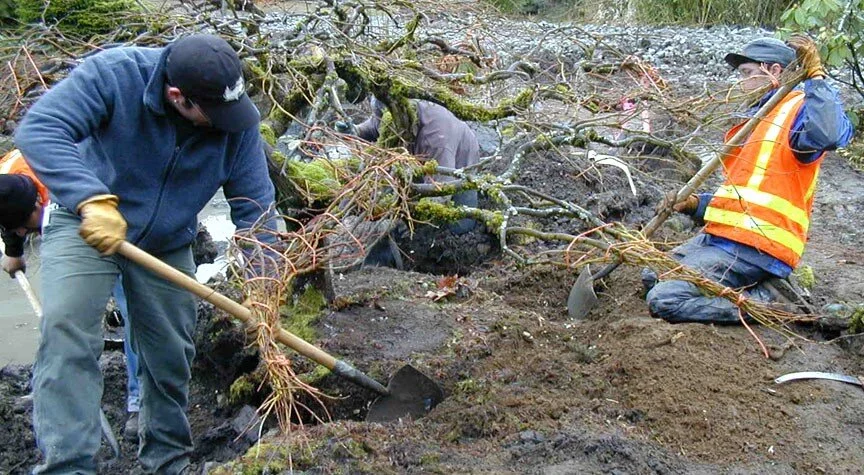
Sharp tools are essential. Severing roots with a dull shovel is as much of an invitation to infection as performing surgery with a hammer. And always check for underground utilities and obstructions before you begin shoveling. A severed power line is a real eye opener.
Tie up branches and sever roots with SHARP tools.
Backfill the trench with the original soil, placing the subsoil on the bottom of the trench and the topsoil on top (hence the names, folks...) Water the plant and the trench and monitor the water throughout the dormant season. Root systems extend far beyond a plant's drip line, and by reducing the size of the root system you have drastically reduced the plant's ability to uptake water. Most years Mother Nature takes care of our winter irrigation just fine, thank you, but if we get an usually dry winter you may need to give your patient a bit of hydration. Over the next few months the plant will produce a dense, fibrous root system much more likely to survive the rigors of transplanting.
If you didn't have time to root prune, move your plant anyway. When it comes to moving plants, the Pacific Northwest climate is forgiving, and this is a rare instance where our interminably dreary, not-quite-a-monsoon-season works in our favor. Jerry Seinfeld says that "Seattle is a moisturizing pad cleverly disguised as a city", and our terrarium-like environment during the deep dark days of winter means that plants don't need to work as hard to recover from being transplanted.
Timing is essentially the same as for root pruning, though you might want to shrink the window of opportunity a bit, say from November 1st to February 15th. Making certain that our patient is metaphorically anesthetized quite deeply before beginning our extraction is imperative. Granted, this is not the most pleasant time to be cavorting in one's garden, but the more you are miserable, the more likely your plant will be happy.
Start by watering the plant to be moved, and the following day dig the planting hole in the new location. Excavate a hole twice the width and 1" shallower than the new root ball. Finish your planting hole prep by putting a little water in the hole, just enough to moisten the first couple inches.
Now you can begin transplanting. Decant a good bottle of Cabernet Sauvignon. You will need it later.
Then tie a few inches of ribbon or flagging tape to the north side of your plant so you can replant in the same orientation. Measure the diameter of your plant's trunk at ground level. For every inch of trunk diameter, you will need 10" to 12" of rootball. If that sounds like it might get a wee bit heavy, you'd be correct. A wet rootball 15" deep and 18" in diameter can weigh over 200 pounds, so plan on having some help or some hydraulics on hand when it's time to lift the plant out of the hole. Plants with a trunk diameter larger than 4" or so will almost certainly require machinery. Or better yet, a credit card. There are several local tree transplanting companies which will happily and professionally take on these larger projects for you, Big Tree Supply being my preferred vendor.
If it can fit on a truck, it's small enough to move. Photo credit: Big Tree Supply
Follow the instructions above for root pruning, tying up the branches and using a sharp spade to excavate a 10" deep trench around the plant just outside the width of the desired rootball. Make the trench wide enough to stand in. Now turn your spade around and begin undercutting the soil at roughly a 30 to 45 degree angle. The goal is to produce a tapered, cone-shaped rootball about 10" in depth at the edges and 15" in depth at the center. Again, severing larger roots with a sharp pruning tool will decrease chances of disease and infection. When the plant moves freely in the hole, have a partner help with sliding a tarp under the plant by tipping the plant from side to side.
Excavated rootball ready to be moved
Sliding a tarp under the excavated rootball to facilitate moving and transplanting
If the plant has to be trucked to its new location or will be stored in a nursery bed prior to transplanting, it's a good idea to wrap the rootball in burlap. Plants with a thick fibrous rootball being moved to new locations onsite can usually be moved just using a tarp. Burlap is also useful for moving plants in very sandy soils. In that case, the rootball should be tightly wrapped before removing it from the hole. Search the web for "How to ball and burlap plants" for more info.
Now summon as many of your drinking buddies as you can muster and have them each grab a corner of the tarp and give it the old heave ho. A little bit of motivational profanity at this juncture can often prove helpful. Drag the plant to its new location and carefully place it into your pre-dug planting hole, remembering to face the north side to the north. The top of your rootball should be 1" above the existing grade, as the ball will settle a bit into the recently fluffed up soil at the bottom the hole.
And away we go...
Backfill with native soil, again placing the subsoil on the bottom and topsoil on the top. If your soil is heavy clay or fast draining sand you could add a shovel or two of compost at this time, but don't overdo it. The roots of new plantings in heavily amended planting holes are trepidatious about venturing out into native soils, which can lead to problems down the road. Water deeply to settle any air pockets in the soil and thoroughly drench the rootball. Starting about 6" from the trunk, mulch the rootball with 2"-3" inches of compost or arborist chips.
Pour a glass of your decanted Cabernet for each of your drinking buddies. They will have earned it. Carefully monitor soil hydration for the next 2-3 years. After that, your patient should be out of the woods and can be watered at its usual recommended rate. Continue administering Cabernet to yourself at the recommended rate. Enjoy!